Enemy AI Setup
Robot Movement 변경
기존 Movement 는 Transform 에 매 프레임 마다 지정한 velocity 만큼을 더했다.
이 방법은 문제가 있는데, XZ로만 움직이기 때문에 slope (비탈길) 에 대한 Movement 는 정의가 되어있지 않다는 것이다.
물론 slope normal 값을 계산해서 Y축으로도 움직이게 하면 되나, 복잡하고 정확하지 않기 때문에 유니티 RigidBody 를 사용할 것이다.
Component 추가
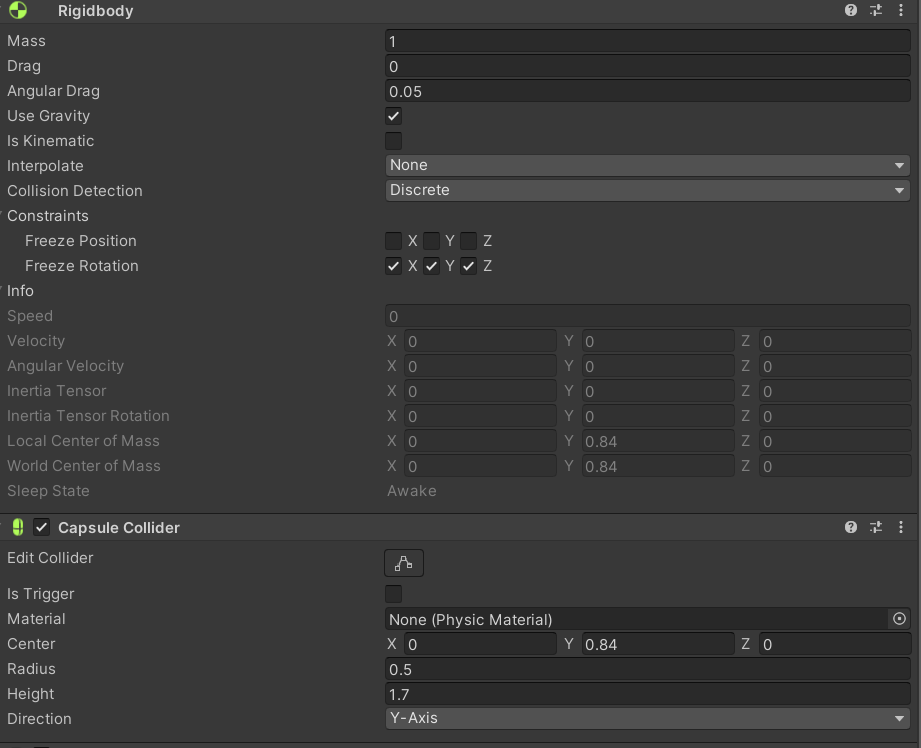
먼저 플레이어 prefab 에 RigidBody 와 Capsule Collider 를 추가했다.
Freeze Rotation 을 하지 않으면 아래와 같이 Force 를 받는 방향으로 회전해 버려서 앞으로 나아가질 못한다...
Script 변경
RobotInputHandler
public class RobotInputHandler : MonoBehaviour
{
private float _maxSpeed = 5.0f;
public float maxSpeed
{
get => _maxSpeed;
set
{
_maxSpeed = value;
if (isAI) navAgent.speed = value;
}
}
public Vector3 GetVelocity()
{
return isAI ? navAgent.velocity : rigidbody.velocity;
}
public void SetVelocity(Vector3 newVel)
{
if (isAI || !rigidbody) return;
rigidbody.velocity = newVel;
}
public void FixedUpdate()
{
...
SetVelocity(new Vector3(movementVector.x, 0, movementVector.y) * maxSpeed / (isCrouch || isAim ? 2 : 1) + new Vector3(0, GetVelocity().y, 0));
...
}
AI는 Rigidbody 를 사용하지 않고 NavMesh Agent 를 사용할 것이기 때문에 GetVelocity, SetVelocity 를 구현하여 상황에 알맞게 알아서 리턴하도록 했다.
maxSpeed 는 getter, setter 정의를 해서 navAgent speed 값과 연동되도록 했다.
RobotAnimationController
public class RobotAnimationController : MonoBehaviour
{
private void FixedUpdate()
{
float animationDirectionX = inputHandler.GetVelocity().x / inputHandler.maxSpeed;
float animationDirectionZ = inputHandler.GetVelocity().z / inputHandler.maxSpeed;
...
animator.SetFloat("ZAxis", animationDirectionZ);
animator.SetFloat("XAxis", animationDirectionX);
animator.SetFloat("Speed", inputHandler.GetVelocity().magnitude / inputHandler.maxSpeed);
}
}
애니메이션 전환을 위해 값 설정도 해주었다. maxSpeed 로 나누어서 0 ~ 1 값을 가지도록 했다.
Enemy AI 세팅
Prefab
Enemy AI prefab 은 Player prefab 에서
- Nav Mesh Agent 추가
- RigidBody 삭제
- Enemy Robot AI 추가
되어 있다.
RobotInputHandler, RobotAnimationController 를 구현할 때 AI를 고려해서 구현하였으므로 재활용이 가능하다.
Script
테스트를 위해서 간단하게 Follow 기능만 구현했다.
2초마다 followingTarget 위치를 찾아서 움직인다.
public class EnemyRobotAI : MonoBehaviour
{
private NavMeshAgent navAgent;
public GameObject followingTarget;
public bool isFollowing = true;
public void Move(Vector3 to)
{
navAgent.SetDestination(to);
}
public void StartFollow(GameObject target)
{
followingTarget = target;
isFollowing = true;
}
public void StopFollow()
{
followingTarget = null;
isFollowing = false;
}
private void Start()
{
navAgent = GetComponent<NavMeshAgent>();
navAgent.updateRotation = false;
StartCoroutine(Routine());
}
private IEnumerator Routine()
{
if (isFollowing && followingTarget)
{
Move(followingTarget.transform.position);
}
yield return new WaitForSeconds(2f);
StartCoroutine(Routine());
}
}